mirror of
https://github.com/gradio-app/gradio.git
synced 2024-12-21 02:19:59 +08:00
* guide on 4 kinds of interfaces

* interfaces

* changelog

* added demo

* added demos and edited markdown

Added standard and unified interface demos, along with updates to the markdown.

* updated notebooks

Updated notebooks with markdown changes and bug fixes

* interfaces

* moved location of guide

* ranemd

* renamed

* removed demo

* updated blocks code to interfaces

* upload requirements.txt file

* Delete run.ipynb to add another notebook file

upload and replace

* Add run.ipynb via upload option

Notebook for unified interface demo

* fixed typo

* fixes

* update demos

* notebooks

---------

Co-authored-by: yuvraj sharma <48665385+yvrjsharma@users.noreply.github.com>
48 lines
2.4 KiB
Markdown
48 lines
2.4 KiB
Markdown
# The 4 Kinds of Gradio Interfaces
|
|
|
|
So far, we've always assumed that in order to build an Gradio demo, you need both inputs and outputs. But this isn't always the case for machine learning demos: for example, *unconditional image generation models* don't take any input but produce an image as the output.
|
|
|
|
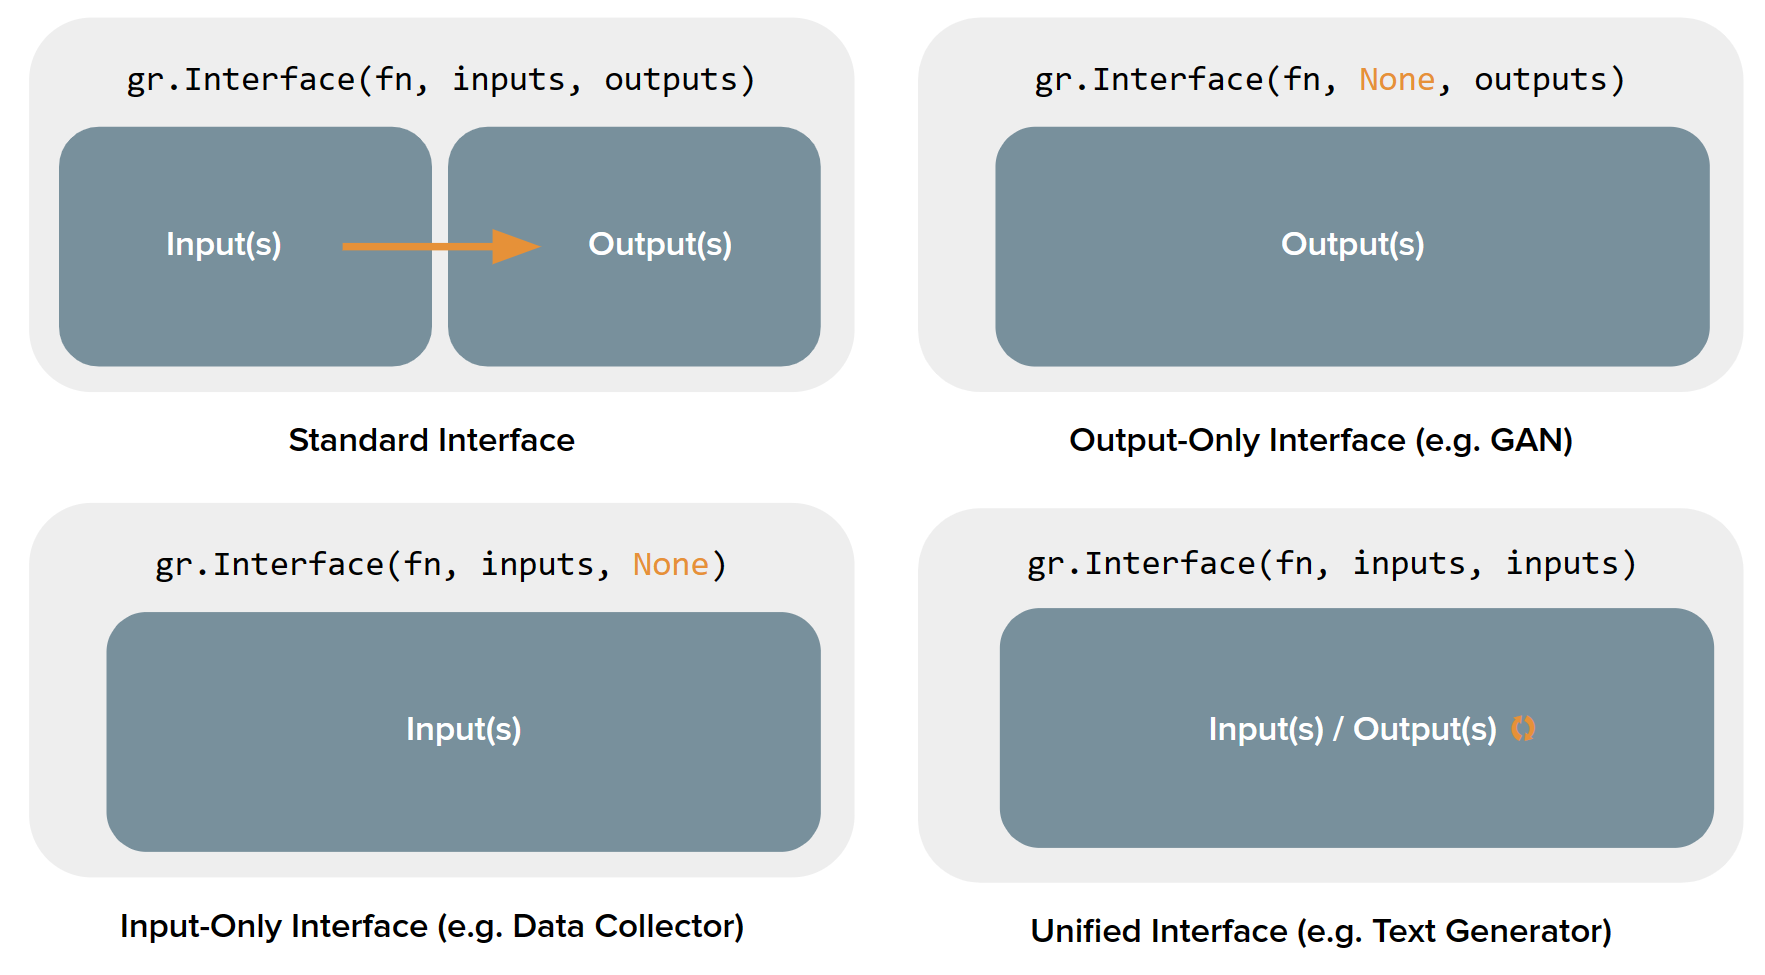
It turns out that the `gradio.Interface` class can actually handle 4 different kinds of demos:
|
|
|
|
1. **Standard demos**: which have both separate inputs and outputs (e.g. an image classifier or speech-to-text model)
|
|
2. **Output-only demos**: which don't take any input but produce on output (e.g. an unconditional image generation model)
|
|
3. **Input-only demos**: which don't produce any output but do take in some sort of input (e.g. a demo that saves images that you upload to a persistent external database)
|
|
4. **Unified demos**: which have both input and output components, but the input and output components *are the same*. This means that the output produced overrides the input (e.g. a text autocomplete model)
|
|
|
|
Depending on the kind of demo, the user interface (UI) looks slightly different:
|
|
|
|

|
|
|
|
|
|
Let's see how to build each kind of demo using the `Interface` class, along with examples:
|
|
|
|
|
|
## Standard demos
|
|
|
|
To create a demo that has both the input and the output components, you simply need to set the values of the `inputs` and `outputs` parameter in `Interface()`. Here's an example demo of a simple image filter:
|
|
|
|
$code_sepia_filter
|
|
$demo_sepia_filter
|
|
|
|
|
|
## Output-only demos
|
|
|
|
What about demos that only contain outputs? In order to build such a demo, you simply set the value of the `inputs` parameter in `Interface()` to `None`. Here's an example demo of a mock image generation model:
|
|
|
|
$code_fake_gan_no_input
|
|
$demo_fake_gan_no_input
|
|
|
|
## Input-only demos
|
|
|
|
Similarly, to create a demo that only contains inputs, set the value of `outputs` parameter in `Interface()` to be `None`. Here's an example demo that saves any uploaded image to disk:
|
|
|
|
$code_save_file_no_output
|
|
$demo_save_file_no_output
|
|
|
|
## Unified demos
|
|
|
|
A demo that has a single component as both the input and the output. It can simply be created by setting the values of the `inputs` and `outputs` parameter as the same component. Here's an example demo of a text generation model:
|
|
|
|
$code_unified_demo_text_generation
|
|
$demo_unified_demo_text_generation
|